On this page
Should you try how to cut a drop fade at home?What tools do you need to cut a drop fade?Which guards do you need?How do you set up before you learn how to cut a drop fade?Where should the curve go when you learn how to cut a drop fade?How to cut a drop fade step by stepHow do you fix common mistakes while you cut?How to cut a drop fade with a skin finishHow to cut a drop fade on curly or coily hairHow to cut a drop fade neckline without a bare patchHow to cut a drop fade in under an hour: a time planHow to cut a drop fade with clippers you already ownWhat is the easiest way to learn how to cut a drop fade?Is it different when you cut someone else?How does hair type change the method?How do you stay safe and avoid razor bumps (pseudofolliculitis barbae)?How do you maintain the fade between cuts?How do you style it once it is cut?Which clipper mistakes do beginners make most often?How does hair length change the method for short, medium and long tops?How to cut a drop fade FAQMore in the drop fade seriesQuick answer. To cut a drop fade, mark a curved guideline that starts at the temple and drops behind the ear, remove the bulk with a #4 guard, then blend down through #3, #2 and #1 with a flicking wrist. Work with the clipper flat to the head, use clipper over comb for the curve and check both sides in two mirrors. Plan 60 to 90 minutes the first time, and start with a low version, since it forgives mistakes.
Most people who search for how to cut a drop fade have already tried a plain fade and want something more shaped. The curve is what makes the job harder: a straight fade only needs a level line, but a curve must match on both sides of a head you cannot see from the back.
This tutorial explains how to cut a drop fade at home in a way a beginner can follow. It lists the tools, the guards, the setup and each step, with the mistake that most often goes wrong at that step and how to fix it. If you would rather leave it to a professional, our drop fade guide shows you what to ask for in the chair.
Should you try how to cut a drop fade at home?
Be honest about your goal. A professional barber trains for years to cut a clean curve, and even a good home cut will not match it on day one. A home attempt makes sense when you cannot get to a barber, when you want to maintain the line between visits or when you enjoy learning a skill. It makes less sense the night before an interview, a wedding or a photo shoot.
- Good reasons: saving money, tidying between visits, practising a skill, remote locations.
- Poor reasons: fixing a bad cut in a hurry, cutting for an important event or cutting somebody else without practice.
If you are a complete beginner, practise on a low version first. Our low drop fade page explains why it is the most forgiving height. For general home haircutting, see how to cut your own hair.
What tools do you need to cut a drop fade?
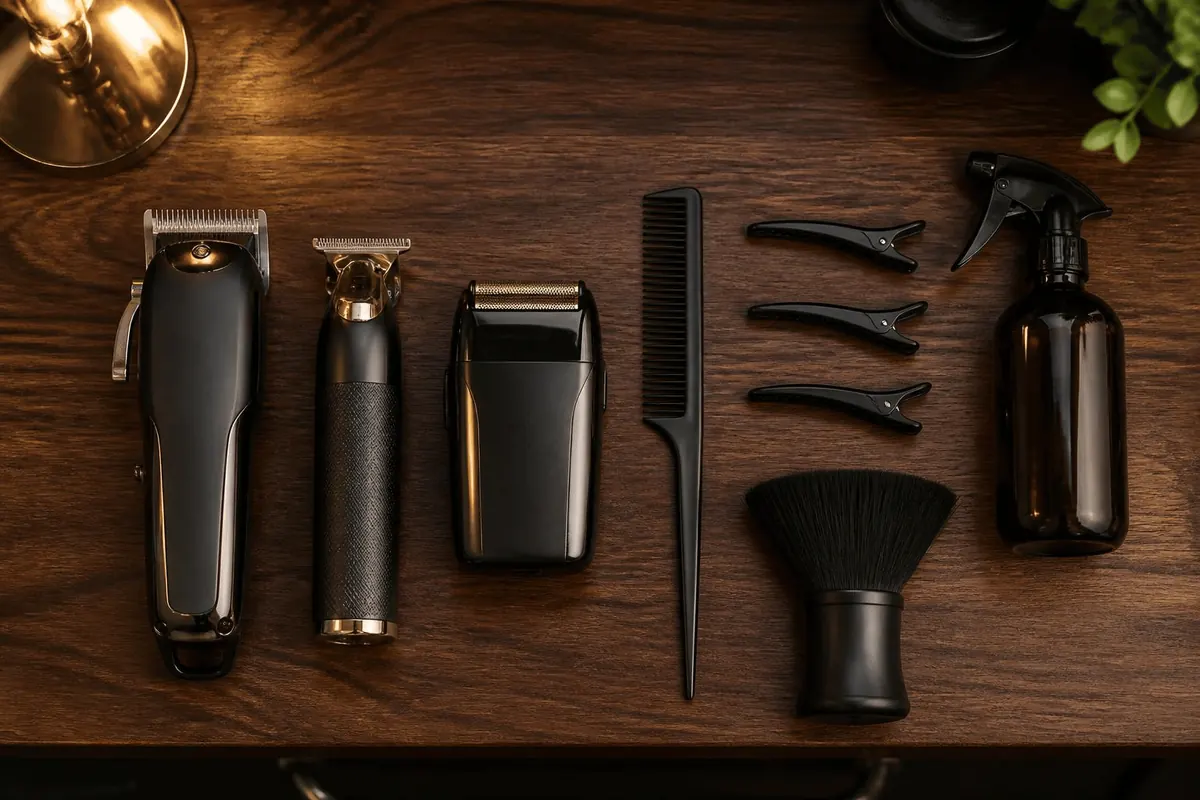
You do not need a full barber kit, but you do need a few specific tools. Cheap or worn blades pull the hair and cause uneven results.
| Tool | What it does | Buying tip |
|---|---|---|
| Clippers with guards #1 to #4 | Remove the bulk and build the fade | Choose a corded or strong cordless model with sharp blades |
| Trimmer | Edges, sideburns and neckline | A narrow blade gives more control |
| Fine-tooth comb | Clipper over comb for the curve | Flexible plastic works well |
| Scissors | The top | Barber scissors, not kitchen ones |
| Two mirrors | See the back and sides | A large wall mirror and a hand mirror |
| Cape or old towel | Catches hair | A dark towel hides stray hair |
| Oil for blades | Keeps the blades cutting smoothly | Apply before every use |
Check the blades are sharp and clean. Dull blades tug and leave ridges. Oil them, test the guards and make sure each guard is marked, since mixing them up ruins the gradient.
Which guards do you need?
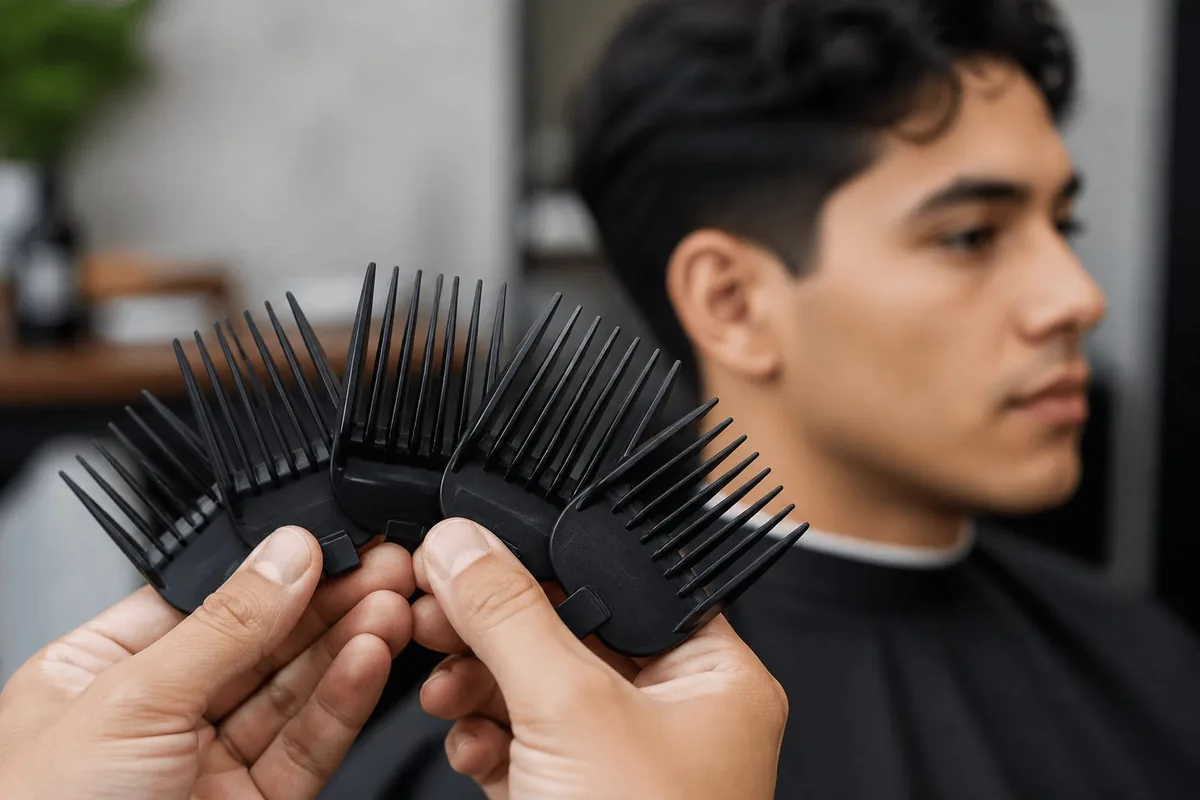
Guard numbers vary by brand, so check the length printed on each guard. Our haircut numbers page explains the common sizes.
| Guard | Typical length | Job in the fade |
|---|---|---|
| #4 | 13 mm | Bulk, and the top of the fade |
| #3 | 10 mm | Upper blend |
| #2 | 6 mm | Middle blend |
| #1 | 3 mm | Bottom of the fade |
| #0.5 or no guard | 1.5 mm or bare | Skin finish (advanced) |
A beginner should stop at #1. Going to the bare blade without experience risks a patchy bottom and sore skin.
How do you set up before you learn how to cut a drop fade?
Good setup prevents most mistakes. Spend ten minutes on it before the clippers go on.
- Use good light. A bright bathroom with light from the front and side shows the blend.
- Set up two mirrors. Stand with your back to a large mirror and hold a hand mirror in front of you, so you can see the back in the main mirror.
- Start with dry, clean hair. Wash and dry it first. Wet hair clumps and cuts uneven.
- Brush the hair. This shows the natural fall and removes tangles.
- Lay out the tools. Keep the guards in order on a towel so you do not swap them by mistake.
- Take a photo of your target. Keep it in view while you cut.
Where should the curve go when you learn how to cut a drop fade?
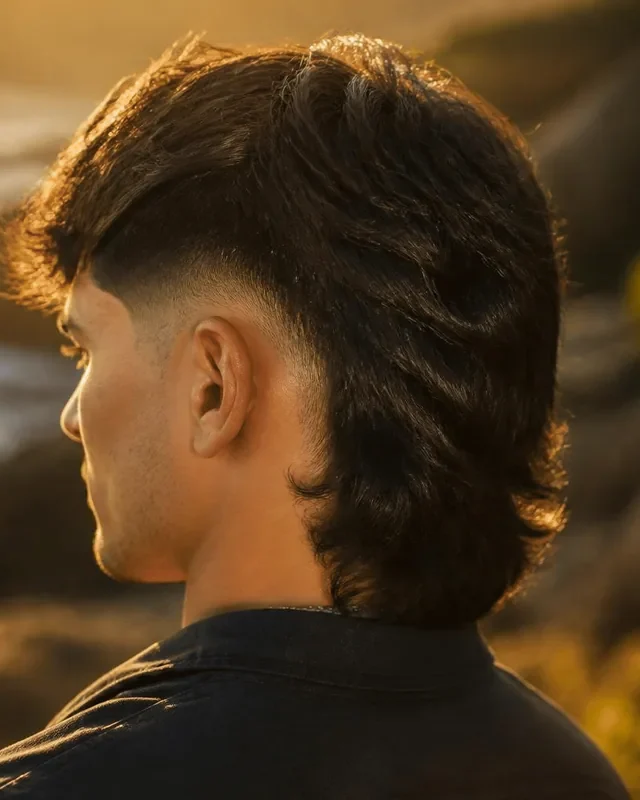
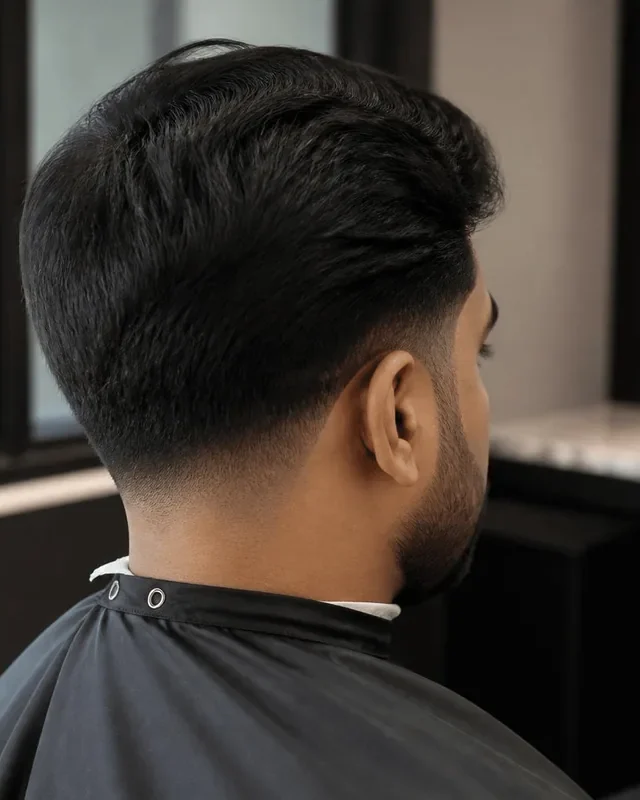
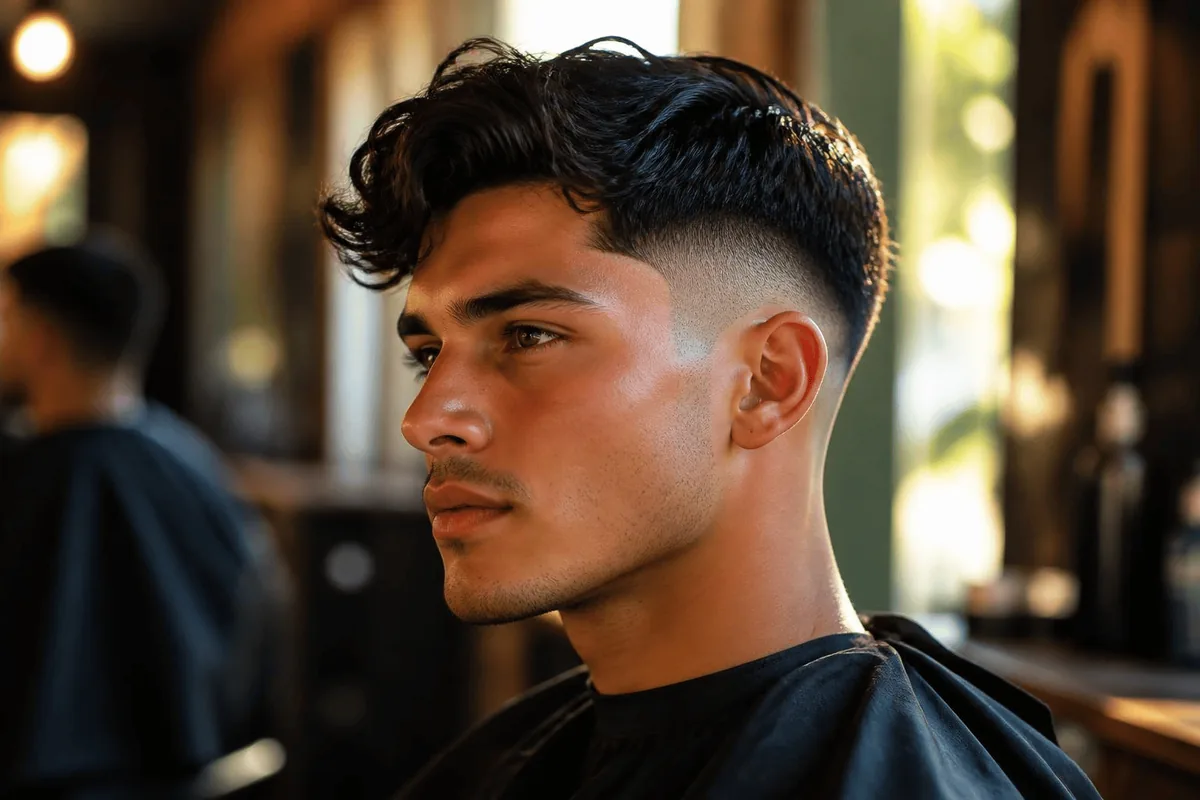
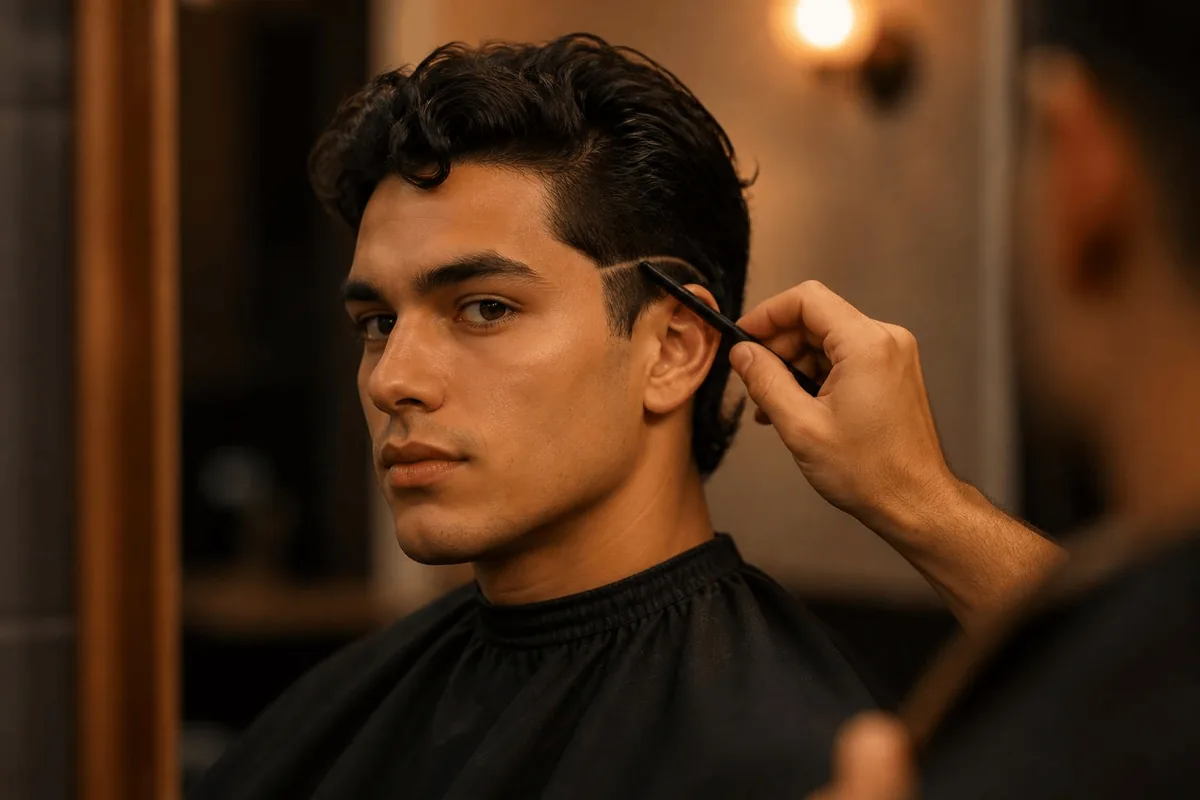
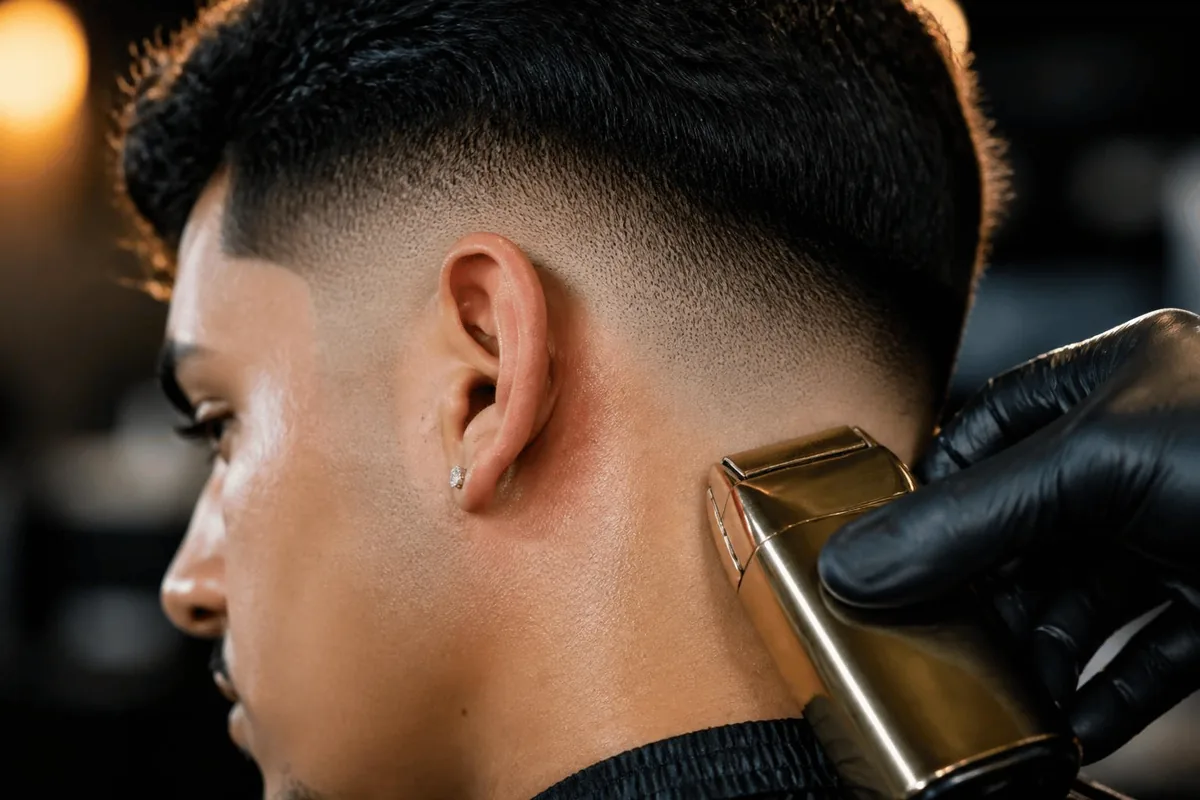
The drop is the whole point, so learn the shape before you cut. The line starts level with the fade height, such as above the ear for a low version or at the temple for a mid one. It runs back toward the ear, then bends down behind it, and it ends at the nape about 2 to 4 cm lower than the start.
Use your finger as a guide. Touch the spot where the line should start, trace it back, then run your finger down behind the ear to the neck. That path is the arc to cut. Mark it with a pencil, or use a trimmer to cut a thin guideline. A guideline lets you check that both sides match before you commit to the full fade.
How to cut a drop fade step by step
Take your time. A fade done slowly is better than one done fast. Each step has a common mistake, and the fix.
Step 1: Section the top
Comb the top up and clip it out of the way, so the clippers do not touch it. What goes wrong: a loose section falls into the clipper path and loses length. Use two clips if the hair is thick.
Step 2: Cut the sides with the long guard
Fit the #4 guard and run the clipper up the sides and back, keeping the guard flat to the head. Start at the bottom and move up with a smooth, steady stroke. What goes wrong: pushing the guard into the skull makes the cut uneven. Use light pressure.
Step 3: Mark the guideline
Draw the curve with a trimmer, a pencil or a gentle guard-free pass. Make the guideline thin and faint. What goes wrong: a guideline that is higher on one side leaves a crooked fade, so check it with both mirrors.
Step 4: Cut below the line with a #3
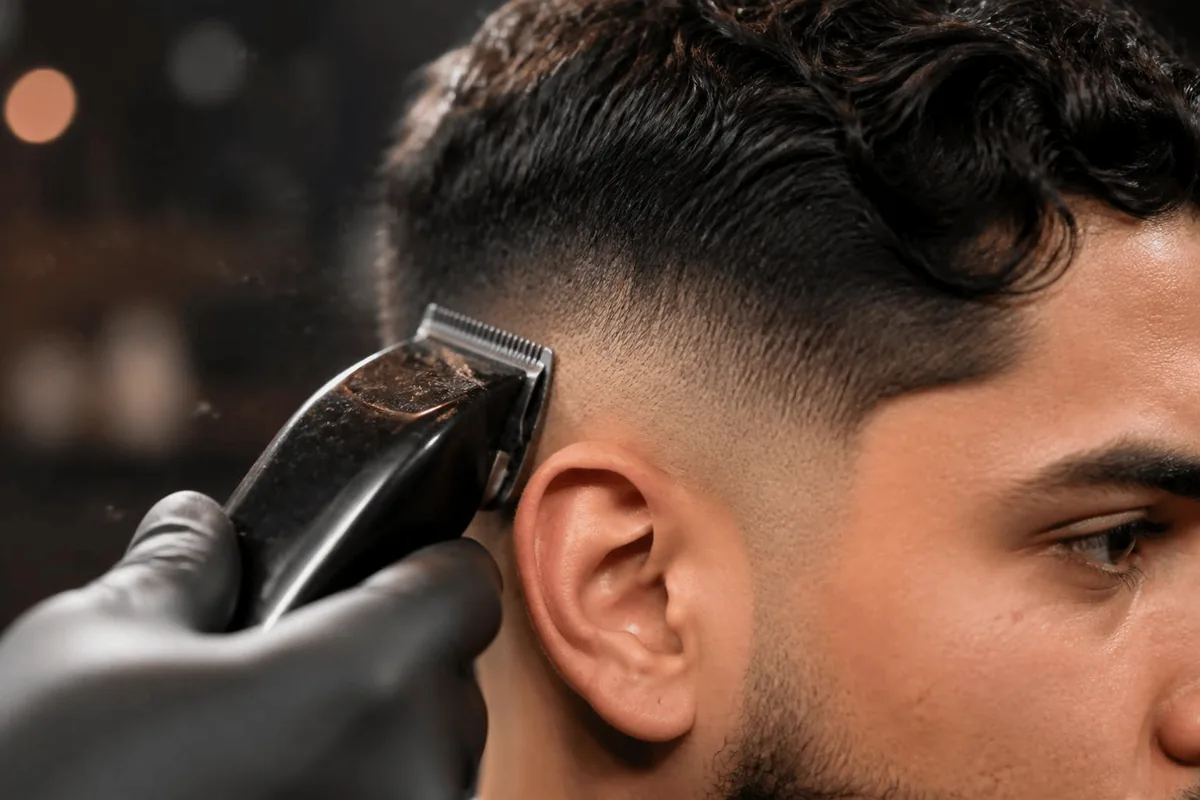
Switch to a #3 and cut from the bottom up to just below the line. Use a flicking motion at the top of each stroke, which blends the edge. What goes wrong: stopping the clipper at the line leaves a hard edge.
Step 5: Drop to a #2 and blend
Cut the lower half with a #2, stopping a little below the #3 line. Flick out at the top of each stroke to blend. What goes wrong: the #2 line sits at the same height as the #3 line, so the steps merge into one band.
Step 6: Finish with a #1
Cut the bottom of the fade with a #1, stopping lower again. Blend with a flick. What goes wrong: going too high with the #1 makes the fade look too short.
Step 7: Shape the curve with clipper over comb
Hold the comb against the head and cut the hair that sticks out through the comb teeth, following the arc behind the ear. The comb guides the clipper and smooths the blend. What goes wrong: the comb drifts away from the head, and the curve flattens. Keep it tight.
Step 8: Detail the edges
Use a trimmer to clean the sideburns, around the ears and the neckline. Keep the neckline natural, which means following the hair growth instead of squaring it off. What goes wrong: cutting the neckline too low leaves a bare patch that is hard to fix.
Step 9: Cut the top
Release the top and cut it with scissors to your chosen length, using point-cutting for texture. What goes wrong: cutting the top before the sides means you cannot judge the balance.
Step 10: Check from every angle
Brush off the loose hair, and check the cut from the front, the sides and the back. Look for stripes, uneven curves and gaps. What goes wrong: missing a patch at the back. Use the hand mirror and run your fingers over the fade to feel for bumps.
How do you fix common mistakes while you cut?
Almost every mistake is fixable if you catch it early. Here is a rescue plan.
| Problem | Cause | Fix |
|---|---|---|
| Visible stripe | Stopped the clipper in one place | Use the #2 or #3 and flick through the line |
| Curve higher on one side | Uneven guideline | Raise the lower side to match and blend |
| Fade too short | Guard too low | Let it grow, then redo with a longer guard |
| Hard line at the top | No blending | Use clipper over comb to soften |
| Patchy bottom | Uneven pressure | Go over with the same guard, lightly |
| Bare neckline | Cut too low | Wait for regrowth, and leave the neckline natural next time |
If a mistake cannot be fixed, stop and book a barber. A professional can usually rescue a cut in ten minutes, and it is cheaper than a second home attempt.
How to cut a drop fade with a skin finish
A skin finish takes the bottom of the fade down to bare skin, and it is the hardest version to do at home. Only try it once you can cut a clean #1 blend. Use a trimmer or a foil shaver, not a razor, and work slowly with the grain. Keep the skin stretched flat with your other hand, and use light pressure. Stop at the line you drew and blend the edge into the #1 with a flick.
Skin finishes show every error, and they grow back in days. If this is your first attempt at how to cut a drop fade, choose a #1 bottom instead, and save the skin version for later. See our high drop fade page for the skin version at a higher height.
How to cut a drop fade on curly or coily hair
Dense curls change the method. The clipper pulls on tight coils, so use sharp, oiled blades and work with the grain. Curls clog guards, so clear the guard after every few strokes. Cut dry, because wet coils stretch and hide the true length. Because curls hide stripes, check the blend by touch as well as by sight, running your fingers across the fade to feel for steps.
Leave the top longer than you think you need, since coils shrink as they dry. If you want to learn how to cut a drop fade on coily hair, practise on the sides and back first, and leave the shaped top for a barber until you are confident.
How to cut a drop fade neckline without a bare patch
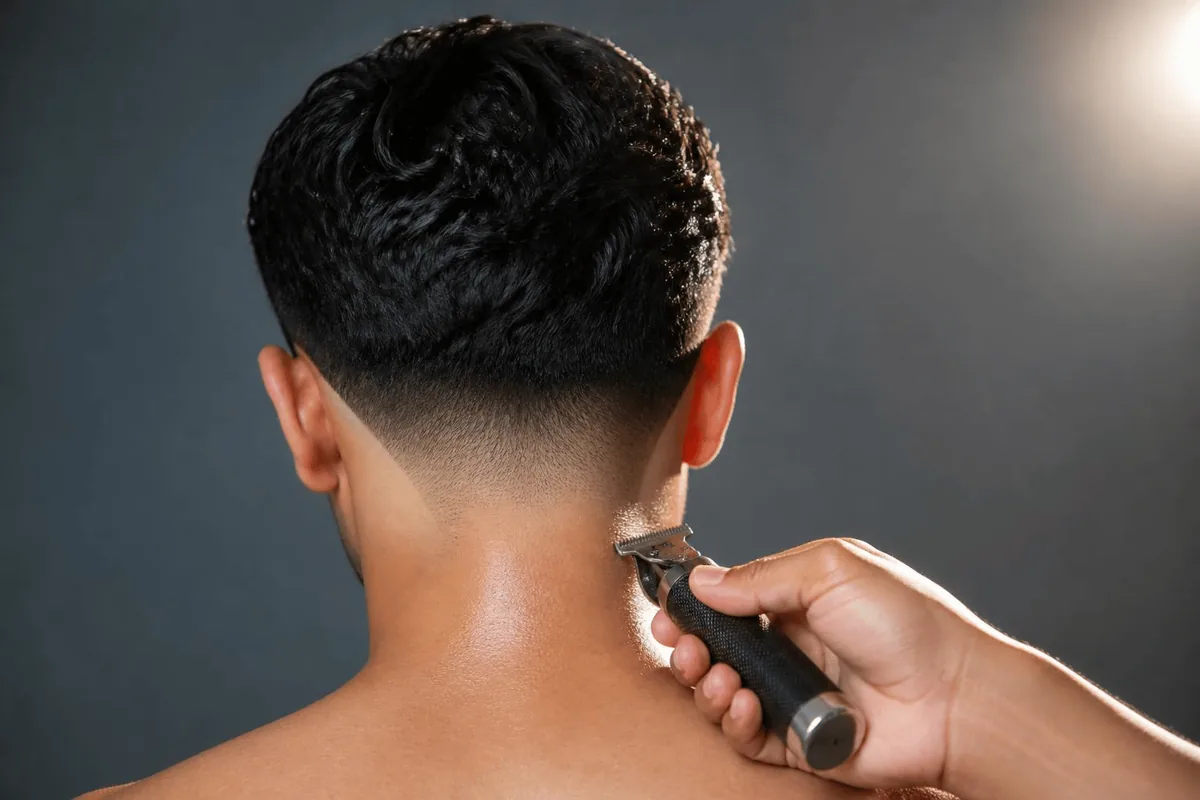
The neckline is where most home cuts go wrong, because it is hard to see and easy to cut too low. Choose a natural neckline, which follows the hair growth and fades into the skin, instead of a square one. Hold the trimmer with the blade facing down, and move up from the nape in short strokes. Stop where the hair thickens, and blend the edge with the clipper. Check with a hand mirror.
Our drop fade neckline guide explains the shapes in detail.
How to cut a drop fade in under an hour: a time plan
A plan keeps you from rushing. This is a realistic schedule for a beginner.
| Stage | Time | Goal |
|---|---|---|
| Setup and mirrors | 10 minutes | Light, tools and photo ready |
| Bulk with #4 | 10 minutes | Even length at the sides and back |
| Guideline | 5 minutes | Symmetrical curve |
| Blend with #3, #2 and #1 | 20 minutes | Smooth gradient |
| Clipper over comb | 10 minutes | Soft, curved outline |
| Edges and neckline | 10 minutes | Clean details |
| Top and check | 15 minutes | Length and balance |
That adds up to about 80 minutes. With practice, you will cut this in half. Do not rush the blending stage, because that is where the cut is won or lost.
How to cut a drop fade with clippers you already own
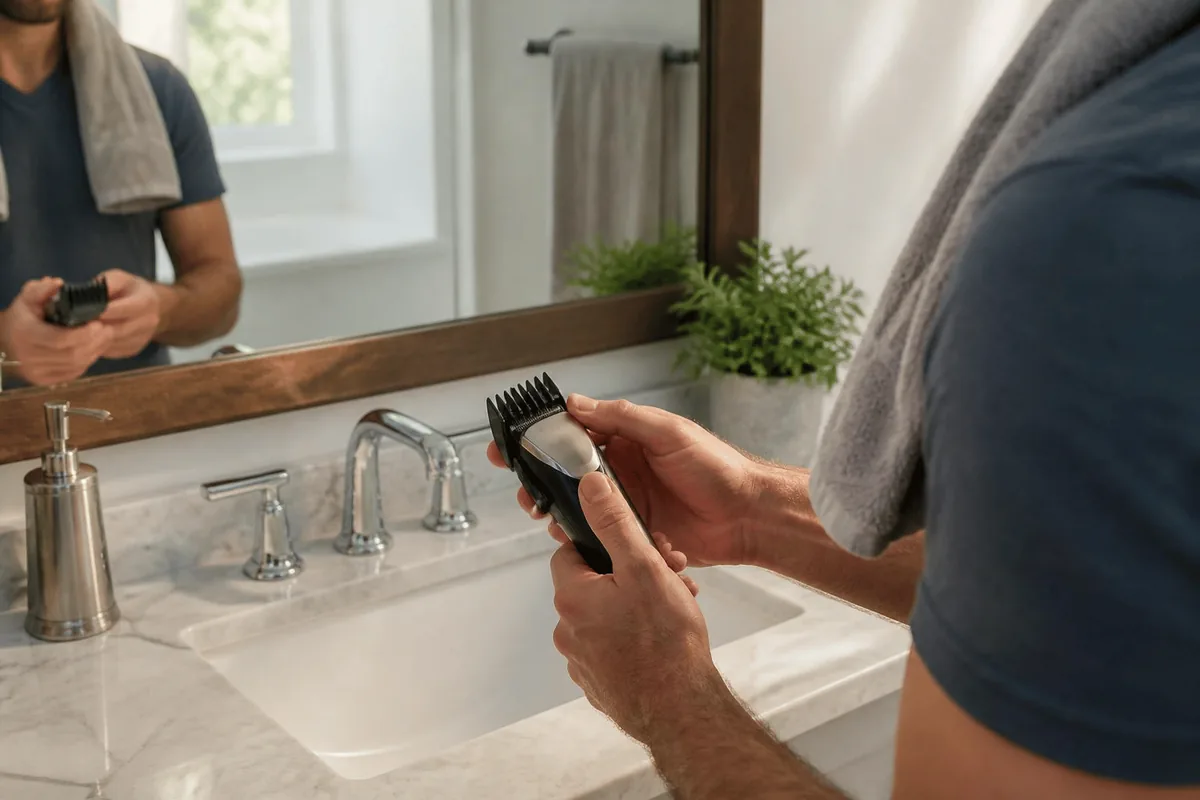
You do not need expensive tools to start. A basic clipper set with a set of guards will do, as long as the blades are sharp. If your guards are not numbered, measure each one with a ruler and label it. If you only have a few guards, you can still make a fade by changing the angle of the clipper, a technique that takes practice. Use the guards in order, and avoid skipping a size.
Cheap clippers heat up and pull the hair, so give them breaks. Replace the blades every year or two, depending on use, and oil them each time. A good tool makes it much easier to learn how to cut a drop fade without frustration.
What is the easiest way to learn how to cut a drop fade?
Practise in stages. Learning how to cut a drop fade takes repetition, and a plan helps.
- Stage 1: cut a plain level fade with one guard and one blend. Learn the flicking motion.
- Stage 2: add the curve, but keep it shallow. Use a low height.
- Stage 3: use clipper over comb for the blend.
- Stage 4: add a skin finish only after you can blend cleanly.
Expect your first few cuts to be uneven. Keep the top long enough to hide small mistakes, and book a barber to tidy up if needed.
Is it different when you cut someone else?
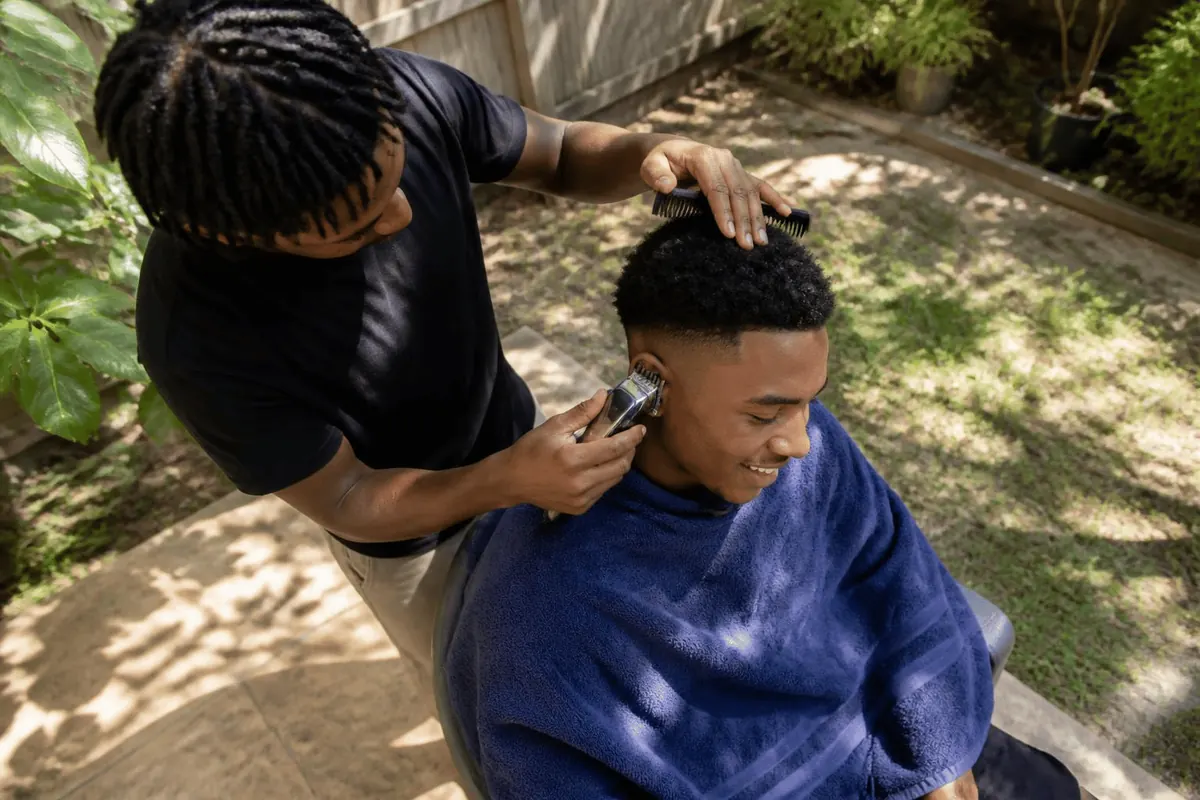
Yes, and in some ways it is easier. You can see the back of their head, and you can stand where you like. The risks are different, though. You are responsible for the result, so start with a longer guard and cut slowly. Ask the person to sit still, with the head level and the chin slightly down. Check often from the front and side. If you are practising on a friend, agree on the style before you start, and expect to take longer than with a professional.
How does hair type change the method?
| Hair type | What changes | Tip |
|---|---|---|
| Straight and fine | Shows scalp and stripes easily | Use a #2 or #3 bottom and clean blends |
| Wavy | Hair moves, so the blend shows less | Cut dry and keep clipper strokes flat |
| Curly | Curls clog guards and hide stripes | Clean the guard often and use a comb |
| Coily | Dense, so the clipper can pull | Use sharp blades and oil, and cut with the grain |
| Thick | Needs more passes | Take small sections and go slowly |
For curls and coils, our pages on drop fade curly hair and drop fade black men have more detail.
How do you stay safe and avoid razor bumps (pseudofolliculitis barbae)?
Razor bumps have a medical name, pseudofolliculitis barbae. It happens when a freshly cut hair curls back and grows into the skin, and it is most common on tightly coiled hair around the nape and behind the ears.
Clippers are safe when used with care, but a few habits reduce risk. Keep the blades clean and oiled, unplug or switch off before changing a guard and never cut with a damaged cord. Do not press hard against the skin. The nape and the area behind the ear are sensitive and easy to nick.
Skin irritation and razor bumps are common after close cutting. The American Academy of Dermatology explains how to prevent them in its guide to razor bump prevention. Cut with the grain, avoid cutting too close and rinse the skin afterward. Use a gentle moisturiser, and see a doctor if irritation does not settle.
How do you maintain the fade between cuts?
You can keep the fade looking fresh with small touch-ups. After two weeks, use a trimmer to clean the neckline and sideburns, following the natural hair growth. Do not touch the curve, since errors show most there. After three weeks, a light pass with a #2 or #3 over the bottom of the fade keeps it neat. When the shape becomes unclear, book a barber and let them reset the line.
Clean your tools after each use. Brush the hair out of the blades, apply a drop of oil and store the guards together. Replace the blades when they start to pull.

How do you style it once it is cut?
Style depends on the top, but a few steps apply to most. Dry the top with a hairdryer, apply a pea-sized amount of paste or clay, shape with your fingers and keep the product off the sides. See best hair products for men for options.
Which clipper mistakes do beginners make most often?
| Mistake | Result | Fix |
|---|---|---|
| Starting too short | No room to correct | Start with a longer guard |
| Rushing the blend | Visible stripes | Slow down, flick the wrist |
| One mirror | Uneven back | Use two mirrors |
| Dull blades | Pulling and ridges | Oil and replace |
| Cutting wet hair | Uneven length | Cut dry |
How does hair length change the method for short, medium and long tops?
The fade is the same job whatever the top looks like, but the length on top changes how much you have to check. On a short top, the guard stops at the crown and the blend is easy to see. On a medium top, section the hair with a clip first so it does not fall into the clippers. On a long top, tie it up or clip it, then cut the sides only as high as the guideline.
Straight hair shows every stripe, so go slower on the blend. Wavy hair hides small mistakes, but the top can puff once you remove the weight at the sides. If you want a skin finish, practise the standard version for a few cuts before you go to a foil shaver.
It also helps to know how this differs from a taper: a taper shortens gently with no curve, while a drop fade follows the head. Learning how to cut a drop fade is easier once you can cut a plain taper cleanly. Once you know how to cut a drop fade, you can adjust the height and skin level yourself.
How to cut a drop fade FAQ
How long does it take to cut a drop fade at home?
Plan 60 to 90 minutes the first time. With practice it drops to 30 to 40 minutes.
What guards do I need?
#1, #2, #3 and #4 are enough for a beginner.
What is the hardest part?
Matching the curve on both sides. Use a guideline and two mirrors.
Can I cut it without clipper over comb?
You can, but the blend will be rougher. The comb helps shape the curve.
Should I cut wet or dry?
Dry gives a more accurate result.
What if I make a mistake?
Stop, let it grow or ask a barber to fix it.
More in the drop fade series
This is a cluster guide under our drop fade pillar. See the mid drop fade and high drop fade guides, or browse the fade haircuts hub.
Guard sizes and times are typical estimates, and a home cut will vary with your tools and hair. Our editorial policy explains how we label estimates.